折腾好久,终于,博客上线了,想要实现的效果和功能也基本全部实现,在这记录一下折腾的过程,供以后参考。
☆hexo安装
☆什么是Hexo ?
Hexo是一款基于Node.js的静态博客框架,依赖少易于安装使用,可以方便的生成静态网页托管在GitHub等平台上。
☆安装步骤
- 安装Git
- 安装Node.js
- 安装Hexo
- Github创建仓库
- 推送网站
☆hexo安装过程
Git和Node.js安装请直接百度下载安装包,进行安装,如不想改变路径,默认一直点下一步就行。
使用npm命令安装hexo(npm命令需要Node.js支持)
在任意目录打开Git(右键,选择Git Bash Here),输入
1 | npm install -g hexo-cli |
这个安装时间视网速快慢,耐心等待安装完成
然后初始化博客,在想要保存博客文件的目录打开git,输入:
1 | hexo init |
等待安装完成,然后输入:
1 | hexo g |
打开浏览器,输入localhost:4000,就可以看到博客了
☆博客同步到GitHub
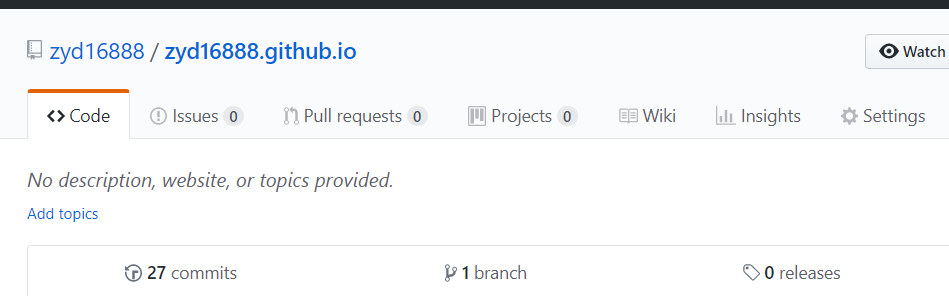
☆GitHub创建仓库
登录GitHub后,点击New repository创建新仓库,仓库名称必须为:用户名/github.io
☆绑定GitHub仓库与本地的hexo文件
在hexo的安装目录下,找到config.yml 文件,打开,在末尾找到deploy,填入以下内容:
1 | deploy: |
☆Git绑定GitHub
打开Git Bash,设置user.name和user.email配置信息,分别输入以下内容,然后回车。
1 | git config --global user.name "GitHub用户名" |
然后,生成ssh密钥文件(一直回车就行):
1 | ssh-keygen -t rsa -C "GitHub注册邮箱" |

生成的密钥文件,默认存储在用户目录下 .ssh 文件夹中,其中 id_rsa为私钥,id_rsa.pub为公钥,将公4钥绑定到GitHub账户上(请自行百度),然后在 git bash 中输入:
1 | $ ssh -T git@github.com |
如果是第一次的会提示是否continue,输入yes就会看到:You’ve successfully authenticated, but GitHub does not provide shell access ,这就表示已成功连上github。

然后在本地的hexo目录中打开 git bash ,输入:
1 | hexo d |
博客就会同步上传到GitHub,然后在浏览器输入:GitHub用户名/github.io,就可以看到网站了。
☆主题更换与美化
本博客采用了next主题,以下内容均以next主题为例。
☆更换next主题
进入hexo安装目录,在git中输入以下内容便会自动下载next主题到themes/next目录下面
1 | git clone https://github.com/iissnan/hexo-theme-next themes/next |
然后打开站点配置文件-config.yml找到theme更改为next并保存
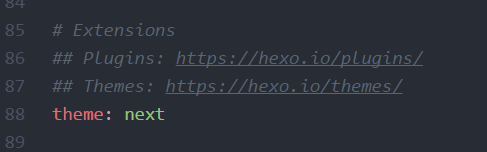
然后执行hexo g 和 hexo d将更改同步
☆next主题美化
☆添加rss
RSS的主要功能是实现订阅,让别人可以实时的订阅你博客的内容
在hexo的安装目录下,执行:
1 | npm install hexo-generator-feed --save |
然后执行hexo g 和 hexo s,打开localhost:4000;就能看到效果了
☆开启统计功能
安装插件:npm install hexo-wordcount --save
在主题配置文件中找到以下字段,按自己需要将其设置成true即可
1 | post_wordcount: |
☆开启分享功能
在主题配置文件中找到以下字段,在jiathis:后面输入true即可
1 | jiathis: true |
add_this_id:为分享统计功能,可以去jiathis的官网注册一个账号,然后把自己的id输入,就可以在jiathis上看到详细的统计数据
如需修改想要展示的分享按钮可以编辑:themes/next/layout/_partials/share/jiathis.swig进行修改
☆添加百度/谷歌/本地 自定义站点内容搜索
安装 hexo-generator-searchdb,在站点的根目录下执行以下命令:
1 | $ npm install hexo-generator-searchdb --save |
编辑 站点配置文件,新增以下内容到任意位置:
1 | search: |
编辑 主题配置文件,启用本地搜索功能:
1 | # Local search |
☆在网站底部加入访问量统计
编辑主题配置文件,修改如下内容:
1 | busuanzi_count: |
☆加入文章字数统计
切换到根目录下,然后运行如下代码
1 | $ npm install hexo-wordcount --save |
然后在/themes/next/layout/_partials/footer.swig文件尾部加上:
1 | <div class="theme-info"> |
当前时间:2018年05月06日 23时55分15秒
☆添加点击爱心效果
创建js文件
在/themes/next/source/js/src下新建文件clicklove.js,接着把该链接下的代码拷贝粘贴到clicklove.js文件中。
代码如下:
1 | !function(e,t,a){function n(){c(".heart{width: 10px;height: 10px;position: fixed;background: #f00;transform: rotate(45deg);-webkit-transform: rotate(45deg);-moz-transform: rotate(45deg);}.heart:after,.heart:before{content: '';width: inherit;height: inherit;background: inherit;border-radius: 50%;-webkit-border-radius: 50%;-moz-border-radius: 50%;position: fixed;}.heart:after{top: -5px;}.heart:before{left: -5px;}"),o(),r()}function r(){for(var e=0;e<d.length;e++)d[e].alpha<=0?(t.body.removeChild(d[e].el),d.splice(e,1)):(d[e].y--,d[e].scale+=.004,d[e].alpha-=.013,d[e].el.style.cssText="left:"+d[e].x+"px;top:"+d[e].y+"px;opacity:"+d[e].alpha+";transform:scale("+d[e].scale+","+d[e].scale+") rotate(45deg);background:"+d[e].color+";z-index:99999");requestAnimationFrame(r)}function o(){var t="function"==typeof e.onclick&&e.onclick;e.onclick=function(e){t&&t(),i(e)}}function i(e){var a=t.createElement("div");a.className="heart",d.push({el:a,x:e.clientX-5,y:e.clientY-5,scale:1,alpha:1,color:s()}),t.body.appendChild(a)}function c(e){var a=t.createElement("style");a.type="text/css";try{a.appendChild(t.createTextNode(e))}catch(t){a.styleSheet.cssText=e}t.getElementsByTagName("head")[0].appendChild(a)}function s(){return"rgb("+~~(255*Math.random())+","+~~(255*Math.random())+","+~~(255*Math.random())+")"}var d=[];e.requestAnimationFrame=function(){return e.requestAnimationFrame||e.webkitRequestAnimationFrame||e.mozRequestAnimationFrame||e.oRequestAnimationFrame||e.msRequestAnimationFrame||function(e){setTimeout(e,1e3/60)}}(),n()}(window,document); |
修改_layout.swig
在\themes\next\layout_layout.swig文件末尾添加:
1 | <!-- 页面点击小红心 --> |
☆动态背景配置文件位置
\hexo\themes\next\source\lib\canvas-nest\canvas-nest.min.js
修改方法
☆右侧目录前标位置
在站点配置文件中
1 | anchors: |
☆hexo s 卡住加载不出来
最近在用hexo 搭建github pages 时,遇到一个问题,
hexo安装没错,也能成功运行。启动也没错。
就是不能访问。。
原因是:
你的电脑端口被占用了。
hexo默认的端口是4000,如果你的电脑安装了福昕阅读器,,就是他,没错,坑爹吧!!!!
启动hexo s 的时候,用这个命令,换一个端口。
hexo s -p 5000
换成5000端口,果断可以访问。
当前时间:2018-05-26 21:59:48
☆末尾版权信息
hexo next自带版权开启
1 | #Declare license on posts |
配置文件路径:\hexo\themes\next\layout_macro\post-copyright.swig
1 | +{% if page.copyright %} |
布局文件路径:\hexo\themes\next\layout_macro\post.swig
自定义版权配置文件路径:\hexo\themes\next\layout_macro\my-copyright.swig
1 | <div> |
☆首页隐藏指定文章
修改主题的index.swig:\hexo\themes\next\layout\index.swig
1 | {% block content %} |
未完待续······